Upload files and images to Dataverse in bulk

Sometimes there is a need manually upload thousands of photos or files to existing records in Microsoft Dataverse. Uploading files in bulk to Microsoft Dataverse by taking them from OneDrive or SharePoint and mapping the display name with the record ID is a great way to save time and keep your data organized. This process can be done with just a few clicks, and it's a great way to keep automating otherwise manual processes.
In general, any source of data you can pull the information or files from will work, but for this tutorial, we will be using SharePoint as the data source, as I had a similar requirement not so long ago.
For this, you will need access to Power Automate, and we will be using the Premium connector to upload files to dataverse. You can either create it as a single-use flow or create a dedicated folder that always automatically uploads new data to dataverse.
Setting up the flow
First, you will need to create a new flow. Here you will have a couple of choices, depending on your business case for the trigger of the flow. Don't worry; you can always change this later if you have changed your mind.
In this article, we will be using SharePoint as the data source, but the guide will be similar to OneDrive for Business as well.
| Trigger | Business case |
|---|---|
| When a file is created in a folder | To create a designated folder to automatically upload new files once they are uploaded. |
| Manually trigger a flow | For one-time or tasks that you want to run manually, future updates might not be necessary |

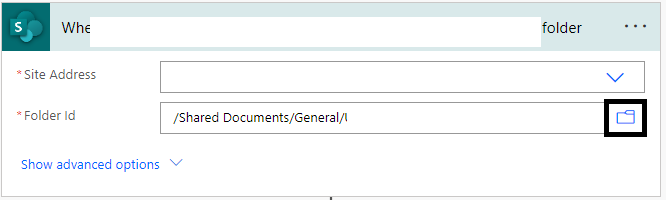
Now, we have to choose the folder that will be used to upload the files to dataverse. For this, you will have to create a new SharePoint site or use an existing one, and select the folder Id from the selector on the top right side.
Next, we need to extract the display name of the file, as that will have a reference to the dataverse record. In our case, the display name matches the CRID (custom) field in the dataverse table.
Let's initialize a new variable and call it varDisplayName, with the type of string and value that will split the display name from the file extension
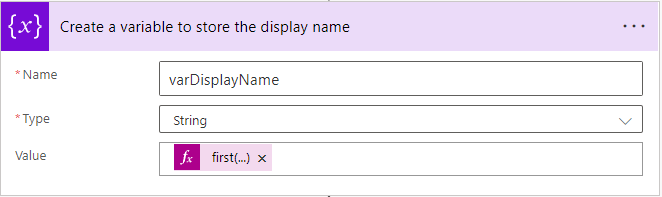
@{first(split(triggerOutputs()?['headers/x-ms-file-name'], '.'))}
Here is the command that I used to extract the name from the full file name. This will disregard any file extension type, regardless if it is .png, .jpg, or other. It might be different in your case if the file name contains anything else than the ID and the file extension and should be modified to match it.
Finding The Dataverse Row
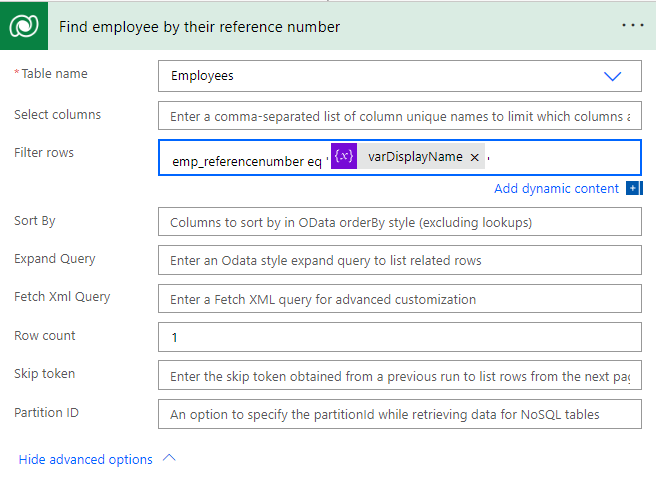
Once we have the file, its contents, and have extracted the display name, we are ready to find the record that is related to the file or image. For this, we will use the premium action called "List Rows" and select the table we want to upload the files to.

There are a couple of things to keep in mind. To improve the performance of the flow, we need to:
- Set the row count - Since we know that there will not be more than one record per file or image, we can limit the row count to "1".
- Use Filter Rows - To locate the correct record without knowing its' GUID, we will need to use the OData style filter and compare the field name with the display name. Your field logical name will differ from the emp_referencenumber.
- Select columns - All that this action has to do is find the row and provide us with the record Id. Since we do not care about other details, we can limit the columns that are returned by providing them to the action.
Uploading The File Or Image To Dataverse
Once we have found the dataverse row that we would like to upload the file to, all that is left to do is use the "Upload a file or an image" action in Dataverse, select the table, and enter the Row ID that the previous action has returned.
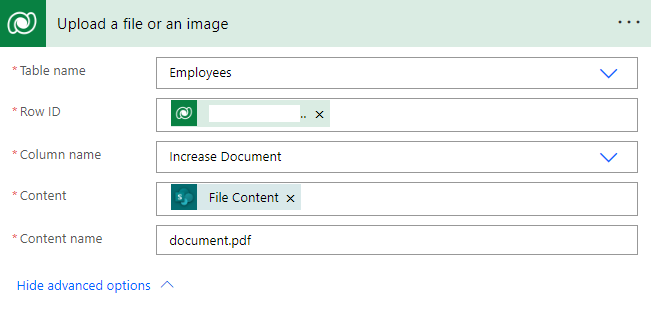
The column name will be different in your case, and you can select it from the dropdown. File content is retrieved from the trigger, and the content name can either be reused by choosing the output from the trigger or standardised as I have done it here.
That's it!
Now you can save and test the flow by uploading a file to the SharePoint folder and waiting for it to be uploaded to the Dataverse record. Of course, this can be modified to your business case.
In case you already have all of the photos available in the folder, you can either move them to the SharePoint folder or modify the flow to iterate over all of the existing images in a folder.
Comments ()