Store Documents and Files in Model-driven Forms
There are many ways to store your files or documents related to your record, embedded in a model-driven form. The right approach will depend on your use case, so consider the benefits of each of the methods.
1. Timeline Control
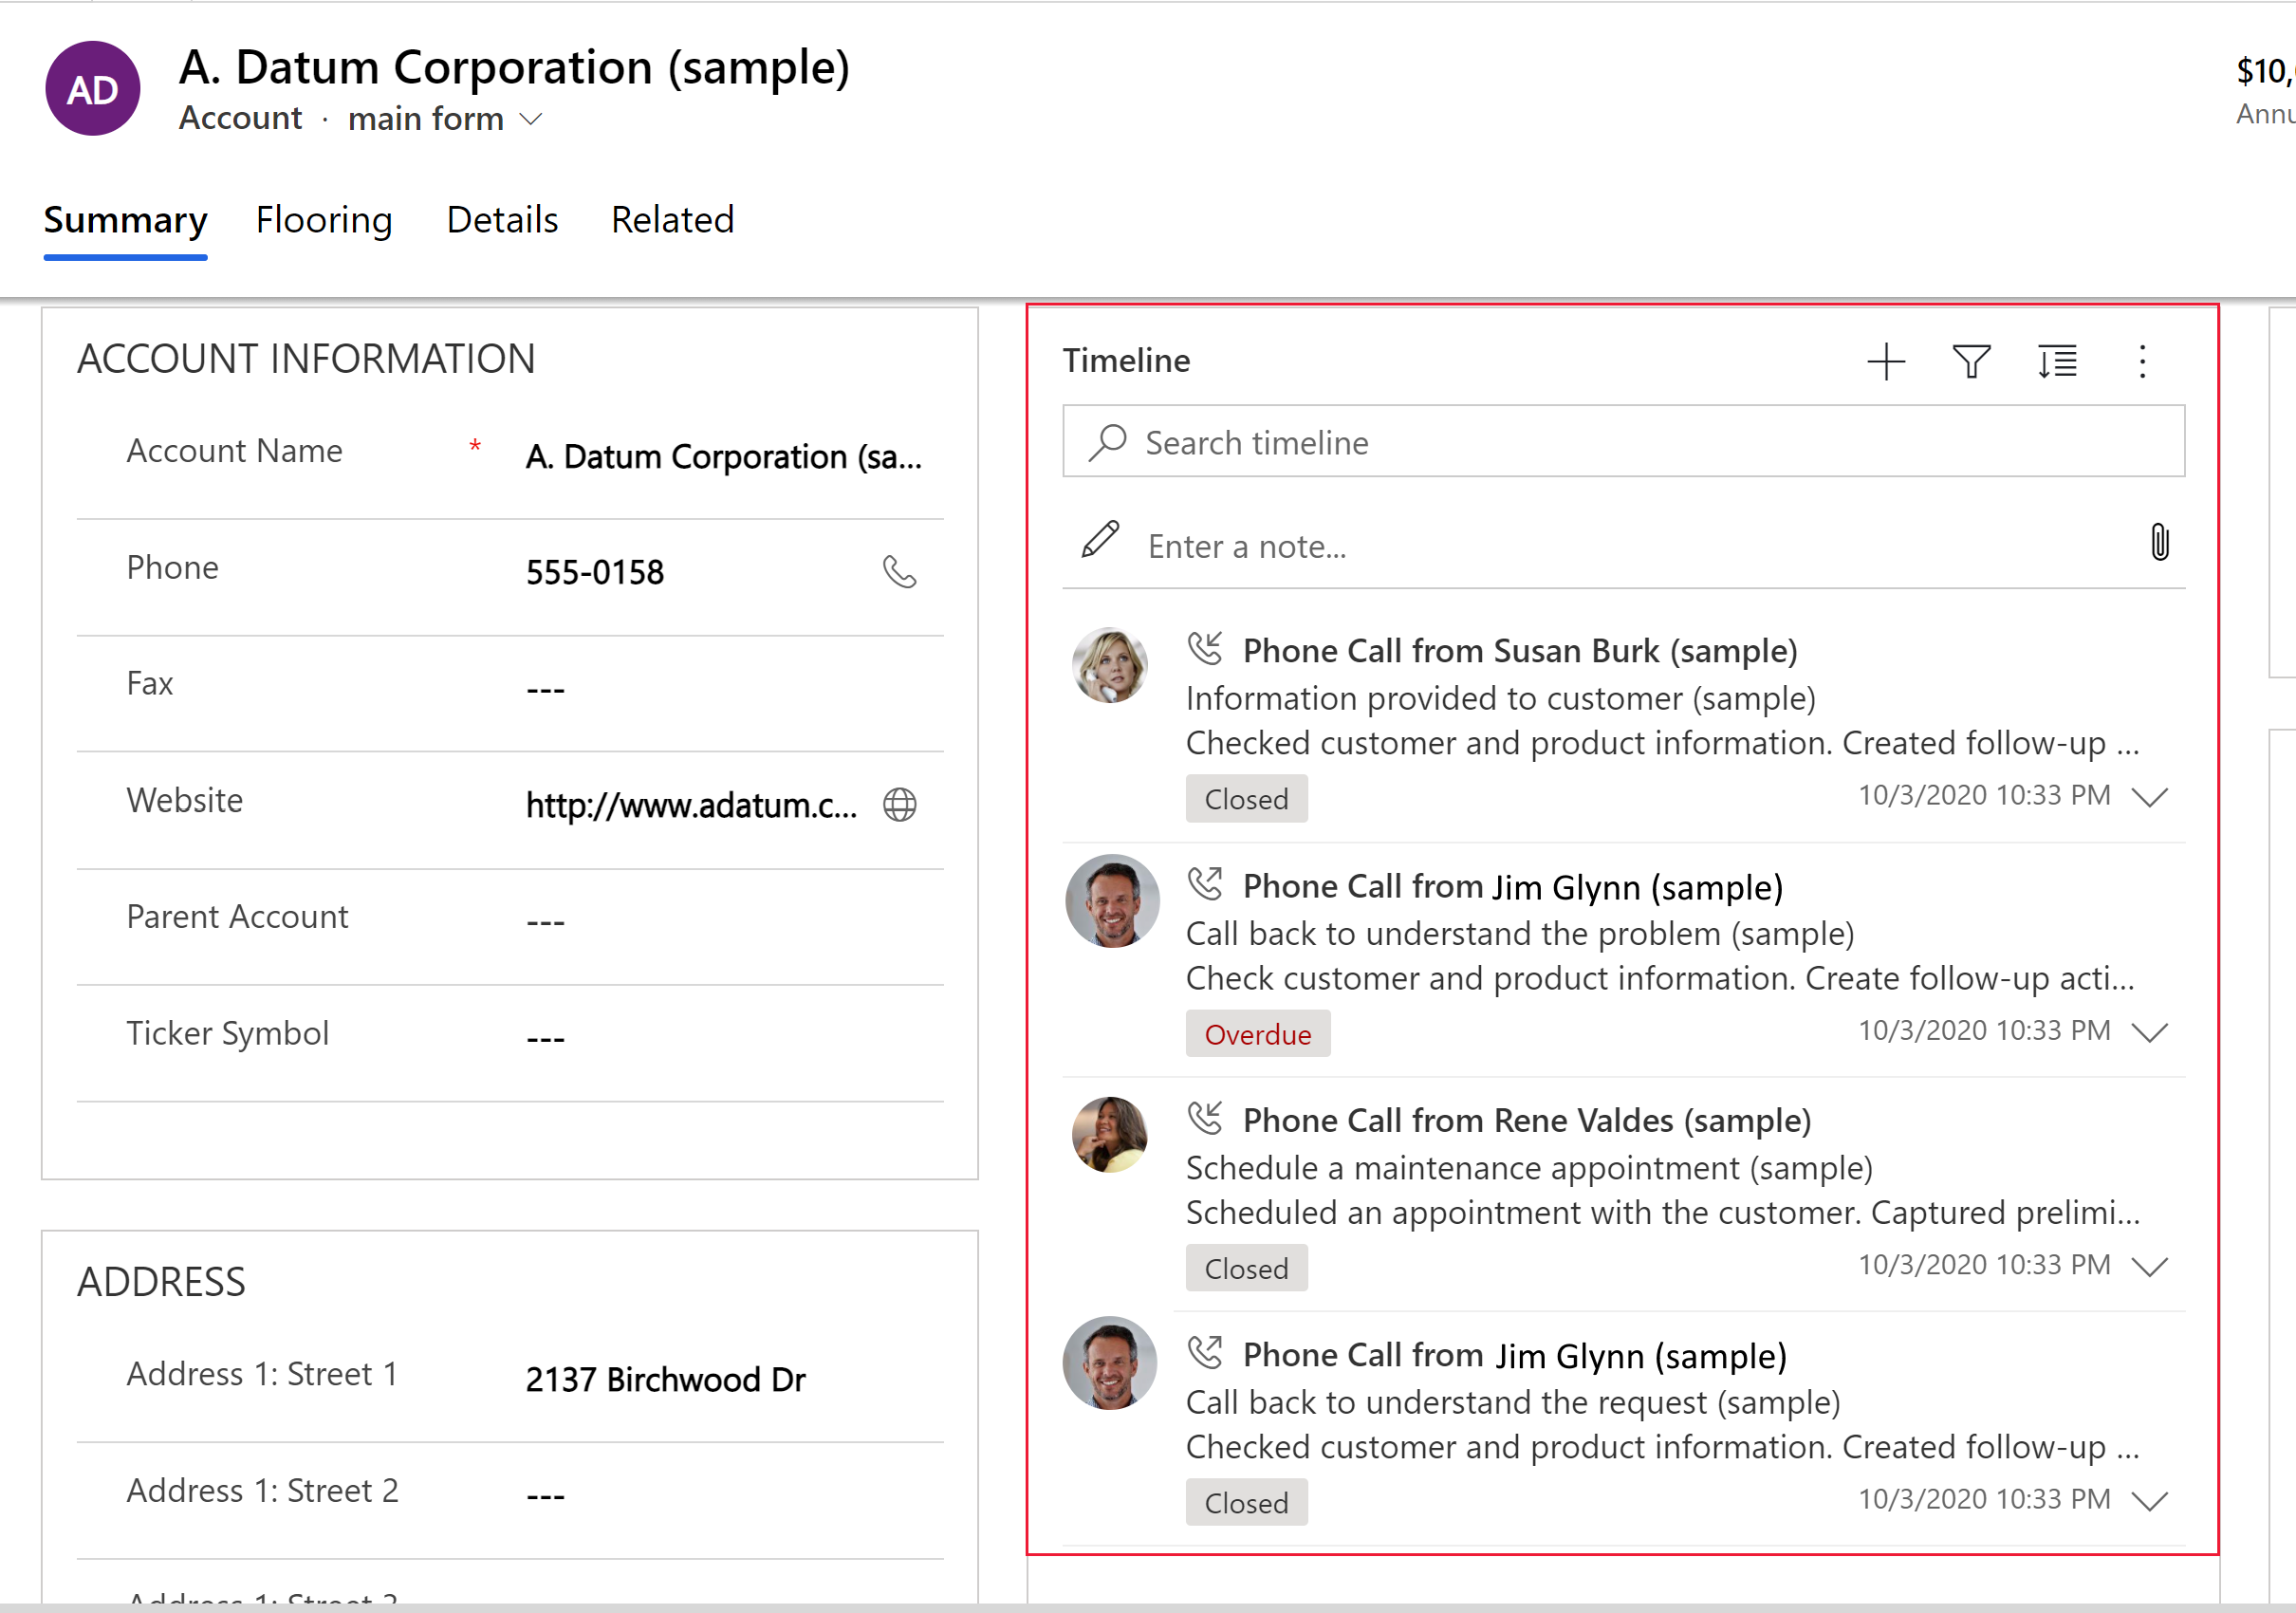
In case the plan is something more than simply storing files, and the file size is relatively small, the timeline might be an option for you. It allows you to create notes, appointments, emails and other activity types further described on the official documentation page.
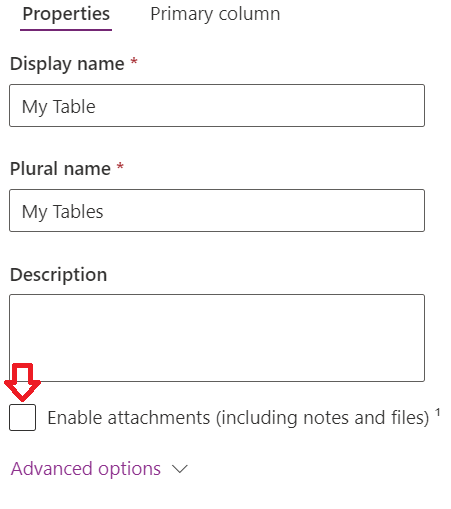
To allow the users to store documents in the timeline, you need to mark the 'Enable attachments' settings under the properties of the table you want to use the timeline for.
That is it! Now the users can attach files related to the record and access them from within the app. Once you have enabled the attachments, go to your model-driven form, and add a new timeline control.
2. SharePoint Integration

Another great option to bypass file size limits, and have a simple way for users to upload existing files, or create new files, is to integrate SharePoint with your model-driven app. This means that you can store files outside Dataverse while still allowing users to interact with them through your forms.
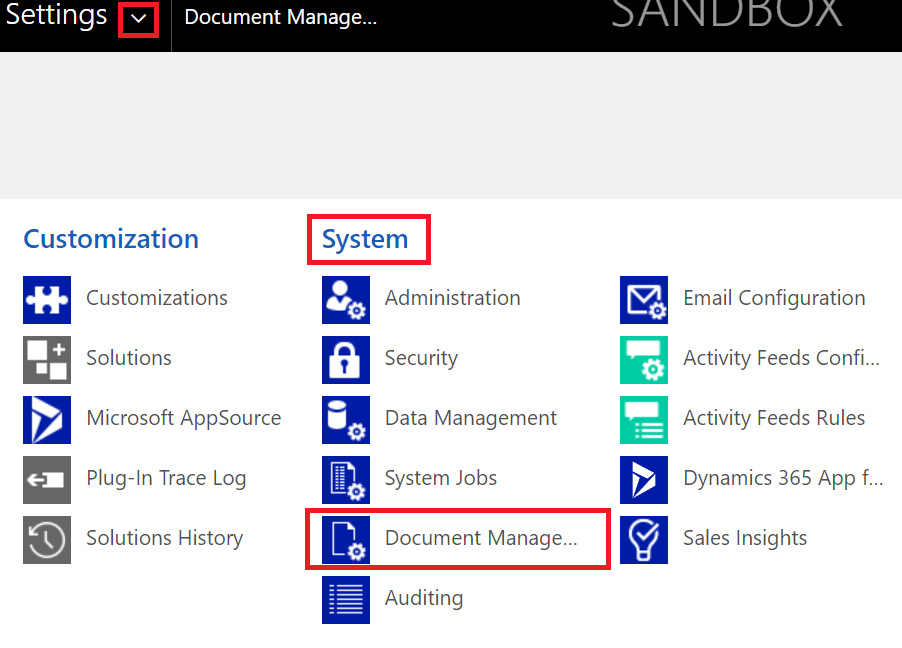
To start, you need to head out to 'Advanced Settings' (top-right corner on any of your apps), click on the arrow next to 'Settings' and select 'Document Management' under the 'System' category.
- Enable Server-Based Sharepoint Integration
Once you select the option, a new pop-up will appear. You can read what changes will occur after enabling the server-based SharePoint integration or click 'Next'.
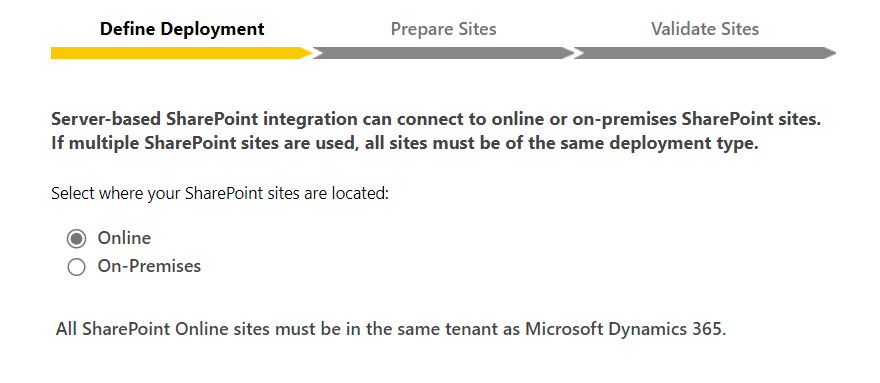
Afterwards, select the SharePoint location. It will, by default, be set as 'Online', but you can change it to 'On-Premesis' if your company still uses that. After you have selected the location, click 'Next'.
Last but not least, enter the SharePoint site where you want to store the documents and validate the zone.
Next, we will need to create a document location. Head back to Settings - Document Management, and select 'SharePoint Document Settings'

Here you will need to select the table (entity) where you would like to store the documents and provide the SharePoint URL. Make sure to include "https://"; otherwise, it might not work for you and display a generic SSL error message.
Then click 'Next', leave defaults and proceed to the final page to confirm your choice.
Comments ()